


Screaming Frog configuration
A good configuration of your tool will be very important to analyze a site in-depth and get all the data you need. Find out how to configure it step by step
Launch your first crawl on Screaming Frog:
When you get to the tool, the first thing you will see is a bar where you can enter the URL of the site you want to analyze:

You just have to enter your URL and select start to launch your first crawl. When it is launched and you want to stop it, you just have to click on Pause and then Clear to reset your crawl
Configure your first crawl on Screaming frog:
There are many ways to configure your crawler so that it only returns information that you are interested in. This can be very useful when you crawl sites with a lot of pages or when you want to analyze a subdomain.
To do this go to the top menu and select Configuration
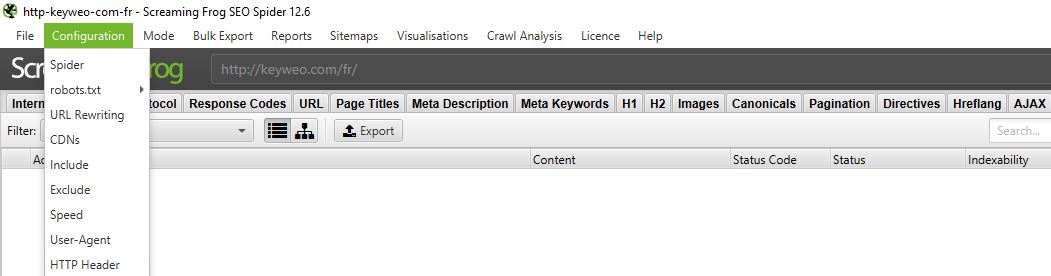
1/Spider:
CRAWL
Spider is the first option that is available when you enter the configuration menu. Here, you can decide which resources you want to crawl
Usually, you should have a window that looks like this:
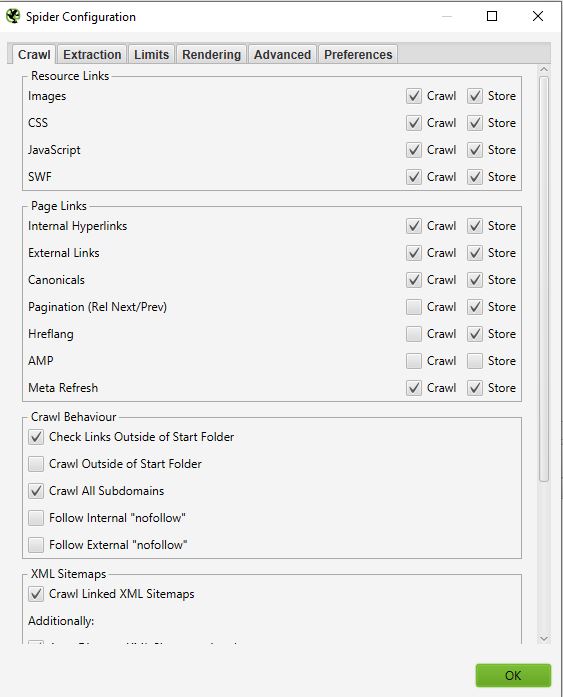
- Resources links :
You can, for example, decide not to crawl the images of the site. Screaming frog will exclude all the elements IMG: (IMG src=”image.jpg”). Your crawl will be faster but you will not be able to analyze the weight of images, the attributes of images …
It is up to you to choose what you need to analyze.
Good to know: It may still happen that you have some images that come up if they are in the form of a href and do not have an img src
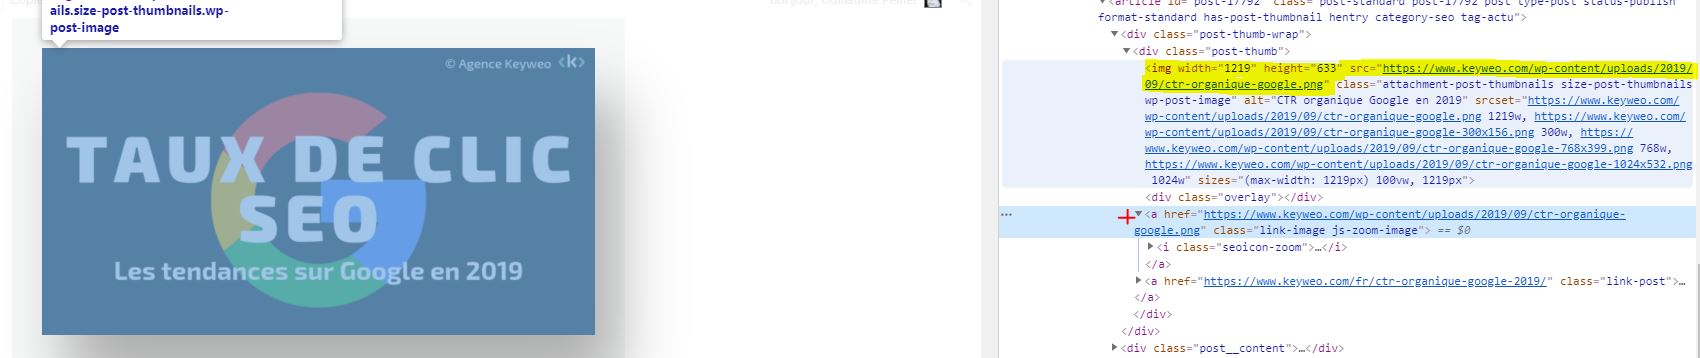
In the screenshot above, yellow will not be crawled, and the link of the image with the red cross will be crawled.
On most of your crawls, you will have a very basic configuration in this window. We recommend you select the crawl and storage of images, CSS, javascript, and SWF files for an in-depth analysis.
- Page links:
In this part, you can also decide what you want to crawl in terms of links. You can for example say that you do not want to crawl canonicals or external links. Again, here it is up to you to choose what you want to analyze.
Example :
Crawl with external links and without external links:
Crawl with external links :
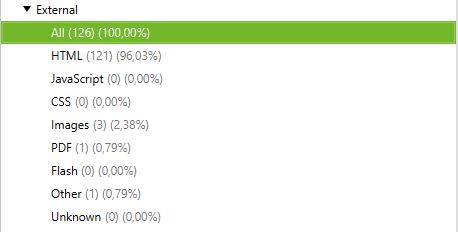
Crawl without external links :
- Crawl Behaviour
In this part, you can give instructions to the tool to crawl some specific pages of your site.
Example :
You have pages in a subdomain and want to crawl them all the same way to analyze them. By checking Crawl All Subdomains, Screaming Frog will be able to bring them up in its crawler.
Below you can see a site that has a subdomain of type: blog. domain name. By selecting Crawl All Subdomains before launching our Crawl, the application brings out all the URLs of this subdomain.

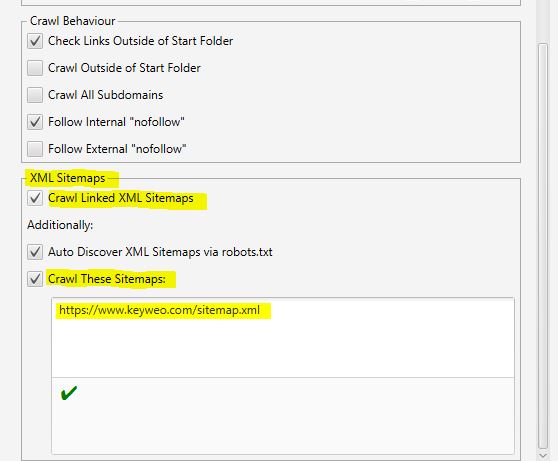
- XML Sitemaps
Do you have a Sitemap on your site? Then it might be interesting to analyze the gaps between what you have in your Sitemap and the URLs that Screaming Frog finds.
Here you can tell Screaming Frog where your Sitemap is so that it can analyze it.
For this you just have to:
1- Check “Crawl Linked XML Sitemaps”
2- Check “Crawl These Sitemaps”
3- Fill in the URL of your sitemap
EXTRACTION
In this part, you can choose which data you want Screaming Frog to extract from your site and bring up in its interface.
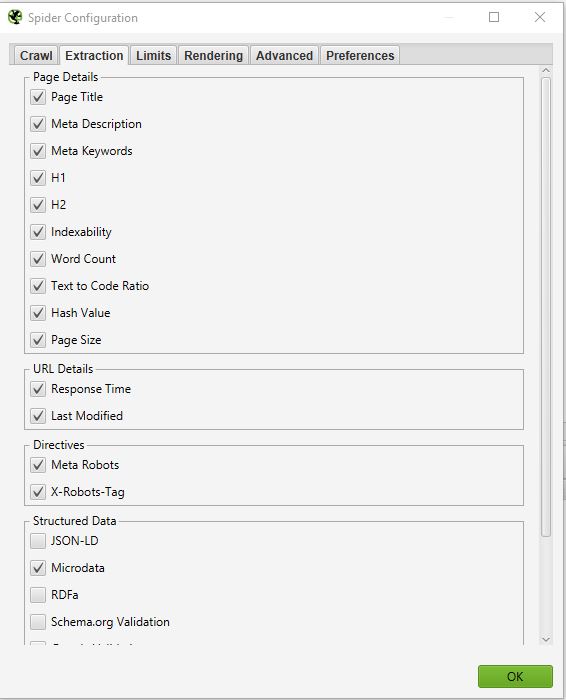
Example :
If you uncheck Word Count, you will no longer have the number of words on each of your crawled pages.
Normally you should not change this part too much because in most cases the information extracted from your site that is selected as default is the most important.
If you want to do an in-depth SEO audit, one thing can be interesting. That is to select the information related to Structured data: JSON-LD, Microdata, RDFa, Schema.org Validation. You will be able to get precious information on the implementation of microdata on your site.
LIMITS
In this third tab, it is possible to define limits for the crawler. This can be particularly useful when you want to analyze sites with many pages.
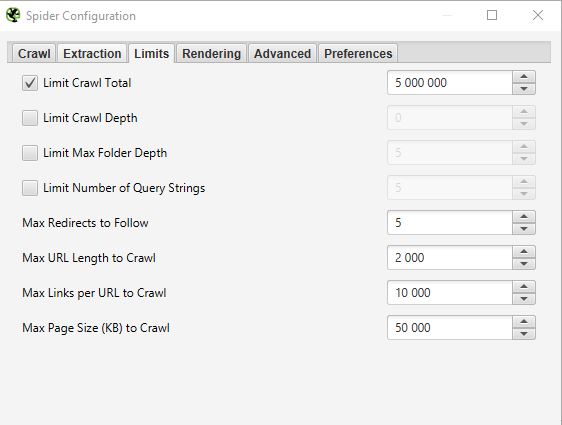
- Limit Crawl total :
This corresponds to the number of URLs that Screaming Frog can crawl. In general, when we analyze a site it does not necessarily make sense to limit it to several URLs. That’s why in general we don’t touch this parameter.
- Limit Crawl Depth :
This is the maximum depth you want the crawler to access. Level 1 is the page located one click away from the homepage and so on. We rarely modify this parameter because it is interesting to look at the maximum depth of a site in an SEO audit. If it is too high, we will have to take action to reduce it.
- Limit Max Folder Depth :
In this case, it is the maximum folder depth to which you want the crawler to have access.
- Limit number query string :
Some sites have parameters of type ?x= in their URLs. This option will allow you to limit the crawl to URLs containing a certain number of parameters.
Example: This URL https://www.popcarte.com/cartes-flash/carte-invitation/invitation-anniversaire-journal.html?age=50&format=4 contains two parameters age= and format=. It could be interesting to limit the crawl to one parameter to avoid crawling tens of thousands of URLs.
This option is very useful for eCommerce sites with many pages and listings with cross-links.
- Max redirect to Follow :
This option allows you to set the number of redirects you want your crawler to follow
- Max URL Length to Crawl :
By modifying this field you can select the length of the URLs you want to crawl. On our side, we rarely use it except in very specific cases
- Max links per URL to Crawl :
Here you can control the number of links per URL that the Screaming Frog is going to crawl
- Max Page Size to Crawl :
You can choose the maximum weight of the pages your crawler is going to analyze
RENDERING
This window will be useful if you want to crawl a site that is running on a javascript framework like Angular, React, etc
If you are analyzing such a site you can configure your crawler as follows:
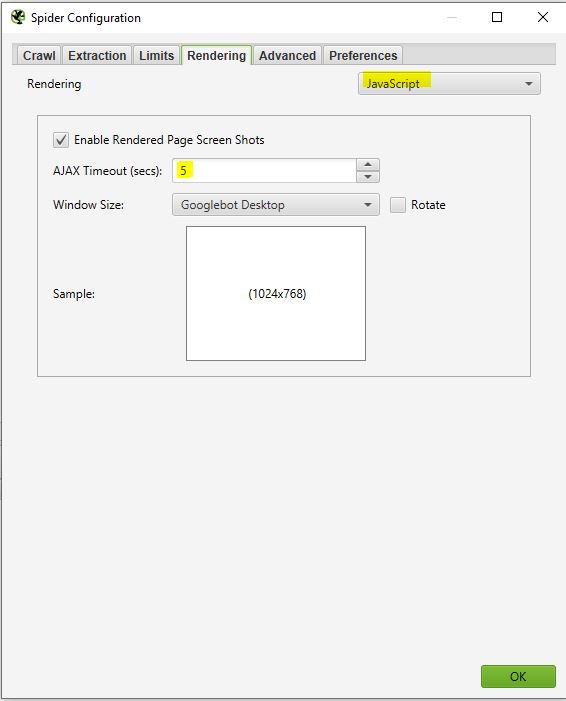
Screaming Frog will take screenshots of the crawled pages. You can find this in your crawl result by clicking on the URLs that come up.
If you see that your page is not rendering optimally, look at the blocked resources in the left frame and you can try to modify the AJAX TIMEOUT
ADVANCED
If you have reached this point it means that you already configured your crawler very well. However, if you want to go further you can still manage some parameters in this “Advanced” part.
Here are some settings that might be useful:
- Pause on High memory usage :
Screaming frog, when it gets to the limit of its memory, will be able to pause the process of crawling and alert you so that you can save and continue your project if you wish.
- Always follow redirect :
This option is useful in case you have redirect chains on the site you are analyzing.
- Respect noindex, canonical et next-prev:
The crawler will not show pages containing these tags in the crawl results. This can again be interesting if you are analysing a site with many pages.
- Extract images from img srcset attribute :
The crawler will extract the images with this attribute. This attribute is mainly used in cases of responsive management of a site. It is up to you to see if it is relevant to retrieve these images.
- Response Timeout (secs) :
This is the maximum time that the crawler must wait for a page to load on the site. If this time is exceeded, Screaming Frog may return a code 0 corresponding to a “connection timeout”.
- 5xx response retries :
This is the number of times Screaming Frog should retry a page in case of an error 500.
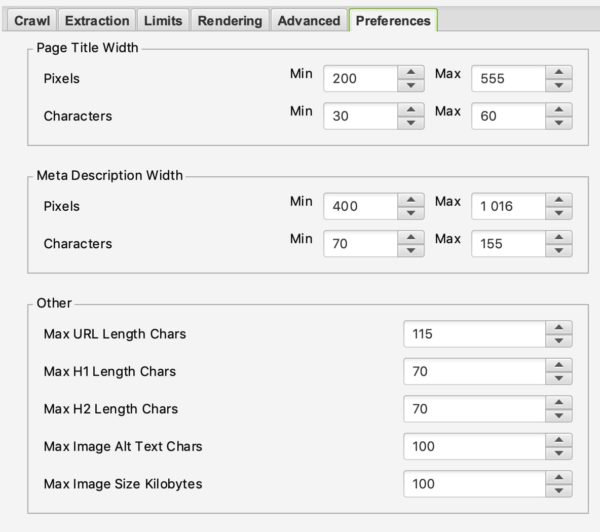
PREFERENCES
In this section, you will be able to define what Screaming Frog should report as errors.
You can define the maximum weight of images, meta-description, or a meta-title from which it can be considered that there is an issue.
Here it is up to you to define your SEO strategy according to your experience and your desires.
2/ Robots.txt
Congratulations on making it this far. The first part was not easy but is vital for a good configuration of your crawler. This part will be much easier than the previous one.
By selecting Robots.txt from the menu you will be able to configure how Screaming Frog should interact with your robots file.
SETTINGS :
You should see this when you get to the Robots settings section.
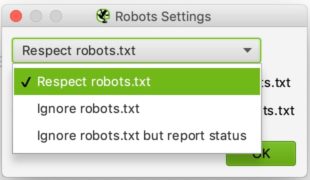
The configuration is relatively simple. In the drop-down list, you can tell Screaming Frog whether it should respect the indications of the robots.txt file or not.
Ignoring robots.txt can be useful, for example, if the site you want to analyze does not allow Screaming Frog to crawl for some reason. By selecting to ignore robots.txt, Screaming Frog will not interpret it and you can normally crawl the site in question.
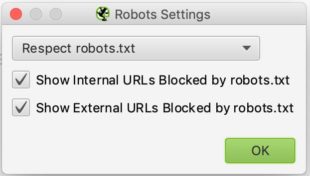
Respecting robots.txt is the most common choice and you can then use the two checkboxes below to decide whether you want to see the URLs blocked by robots.txt in the reports, whether they are internal or external.
CUSTOM :
In this control panel, you can simulate your robots.txt yourself. This can be particularly useful if you want to test changes and see the impact during a crawl.
Note that these tests do not affect your online robots.txt file. If you want to change it, you will have to do that yourself after running your tests in Screaming Frog, for example.
Here is an example of a test:
We have added a line to prevent the crawl of any URL containing /blog/
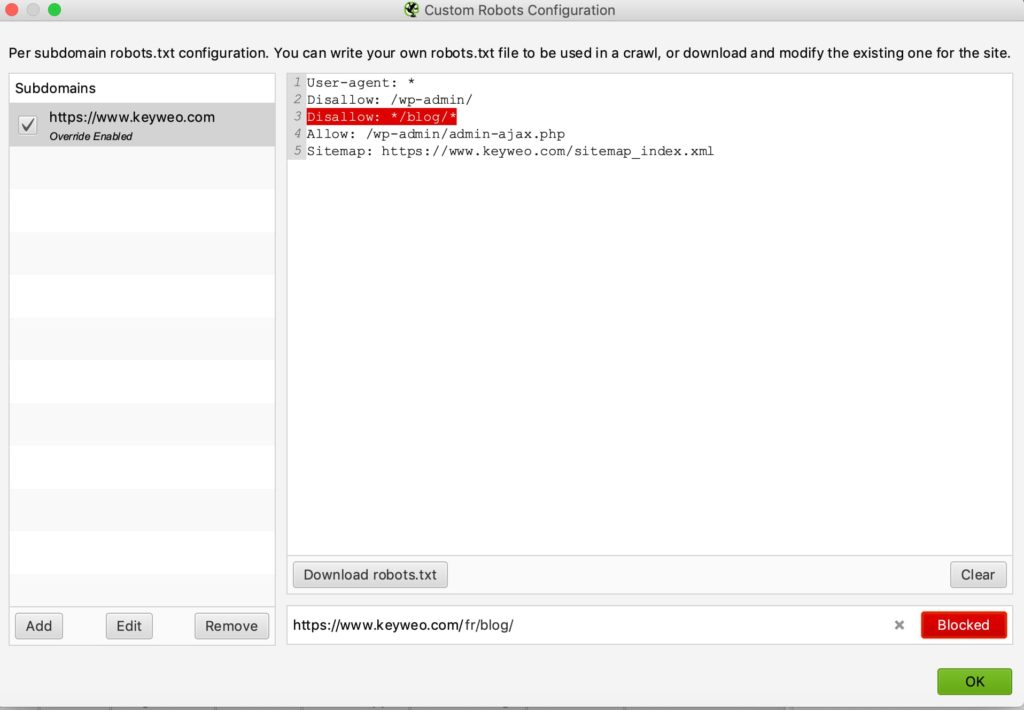
If you look below you will see that in the test we carried out with keyweo.com/fr/blog the URL was indeed blocked.
3/ URL Rewriting
This feature will be very useful in case your URLs contain parameters. In the case, for example, of a site of e-commerce with listings with filters. You can request Screaming Frog to rewrite the URLs.
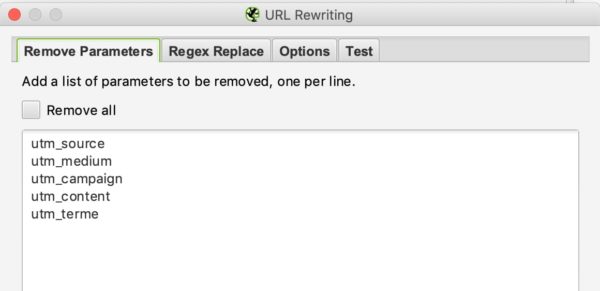
REMOVE PARAMETERS
You can tell the crawler to remove some parameters to ignore them. This could be useful for sites with UTMs in their URLs.
Example :
If you want to remove the utm parameters in your URLs you can set this configuration:
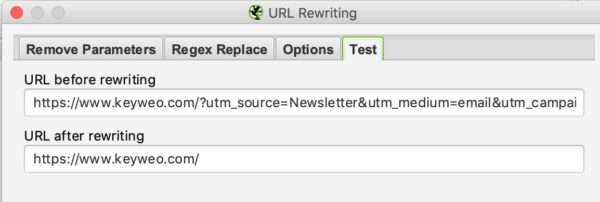
To test if it works you have to go to the test tab and put a URL that contains these parameters to see the result:
REGEX REPLACE
In this tab, you can replace parameters with others. You can find many examples here.
4/ Include and Exclude
At Keyweo we use these features a lot. It is particularly useful for sites with many URLs, and you only want to crawl certain parts of the site. Screaming Frog will be able to use the indications you make to make only certain pages appear in its list of crawl results.
If you manage or analyze large sites, this feature will be very important to master because it can save you many hours of crawling.
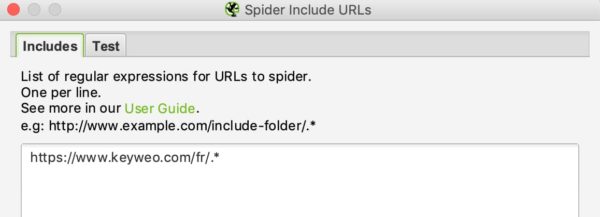
The interface of include and exclude looks like this:
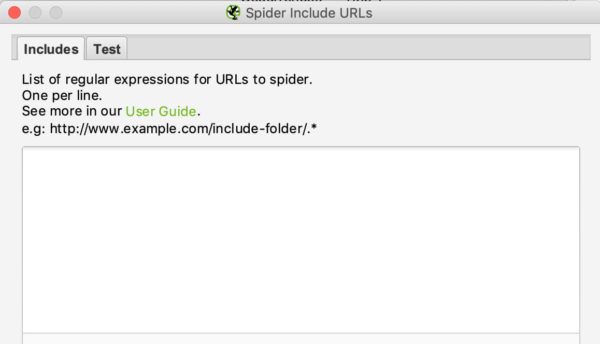
You can list the URLs that you want to include or exclude by putting one URL per line in the white box.
For example, if I only want to crawl on Keyweo´s /fr/ URLs, here is what I can put in my include window:
As with URL rewriting, you can see if your include works by testing a URL that should not be included in the crawl:
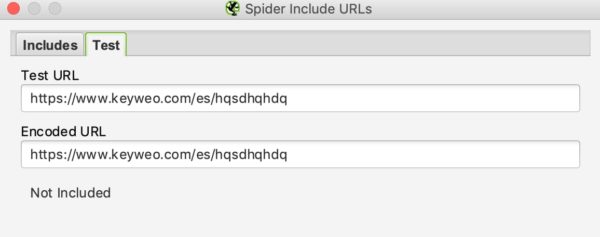
In our example above we can see that the include works since the URLs containing /es/ are not taken into account.
If you wish to exclude certain URLs, the process is similar.
5/ Speed
In this part, you can choose how fast you want Screaming Frog to crawl the site you want to analyze. This can be useful when you want to scan large sites. If you leave the default setting, it may take a long time to crawl that website. By increasing the Max Threads Screaming Frog will be able to crawl the site much faster.
This configuration should be used with caution because it can increase the number of HTTP requests to a site, which can slow the site down. In extreme cases, it can also cause the server to crash or cause you to be blocked by the server.
In general, we recommend you leave this configuration between 2 and 5 Max Threads.
You can define several URLs to crawl per second.
Don’t hesitate to contact the technical teams who manage the site to optimize the crawl of the site and avoid an overload.
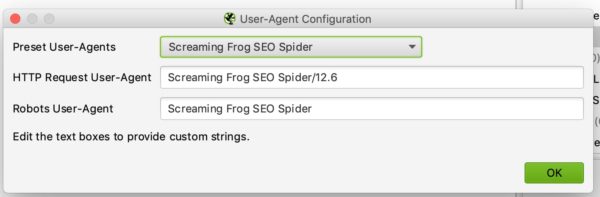
6/ User-agent configuration
In this section, you can set which user agent you want to crawl the site with. By default, this will be Screaming frog, but you can for example crawl the site as Google Bot (Desktop) or Bing Bot.
This can be useful for example if you cannot crawl the site because the site blocks crawling with Screaming Frog.
7/ Custom Search and Extraction
CUSTOM SEARCH
If you want to perform specific analysis by highlighting pages with certain elements in their HTML code, you will love Custom Search.
Use Examples:
You want to bring up all the pages containing your UA code – Google analytics. It might be smart to do a search via Screaming Frog by putting your UA code in the search window. This could be used to see if any of your pages do not have the analytics code installed.
You have started a blog on the theme of “birth” and want to see on which pages the word “baby box” appears so that you can optimize these pages? That is possible. The only thing you have to do is put in your custom search box: “baby box“.
So, you will see this:
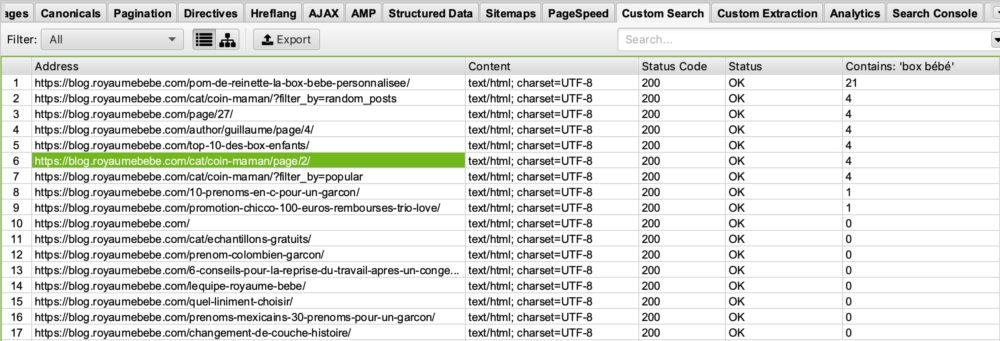
If you look in the “Contains Box Bébé” column you can see that screaming frog has listed the pages containing box bébé. I’ll leave it to you to imagine what this can do for you in your SEO optimizations 🙂
EXTRACTION
Screaming Frog, through its Extraction feature, can also allow you to scrape certain data for use in your further analysis. Thus, at the agency, we are using this tool more and more for certain specific analyses.
To scrape these data you will have to configure your extractor by telling it what it should retrieve via an Xpath, a CSSpath, or a regex.
You will find all the information for this configuration via this article: https://www.screamingfrog.co.uk/web-scraping/
Examples :
Do you want to find out the publication date of an article and then decide to clean up or re-optimize certain articles? This feature allows you to extract this information from the results list of your Screaming Frog and then export it to Excel, for example. Great, isn’t it?
Do you want to export the list of your competitor’s products? Once again, you can simply configure your extractor to retrieve this information and then play with this data in Excel.
The possibilities for using this extraction tool are unlimited. It is up to you to be creative and master it perfectly.
8/ API Access
In this window, you can retrieve data from other tools by configuring your API access. For example, you can easily upload your data from Google Analytics, Google Search Console, Majestic SEO, or Ahrefs into your tables of information for each URL.
The only downside is that you need to be careful to watch your API credits on your various tools as they can go very quickly.
9/ Authentication
Some sites require a login and password to access all content. Screaming Frog allows you to manage the different cases of access via password and login.
BASIC CASE OF AUTHENTICATION
In most cases, you will not need to configure anything because by default, when screaming frog encounters an authentication window, it will ask you for a login and password to perform the crawl.
This is the window you should have:
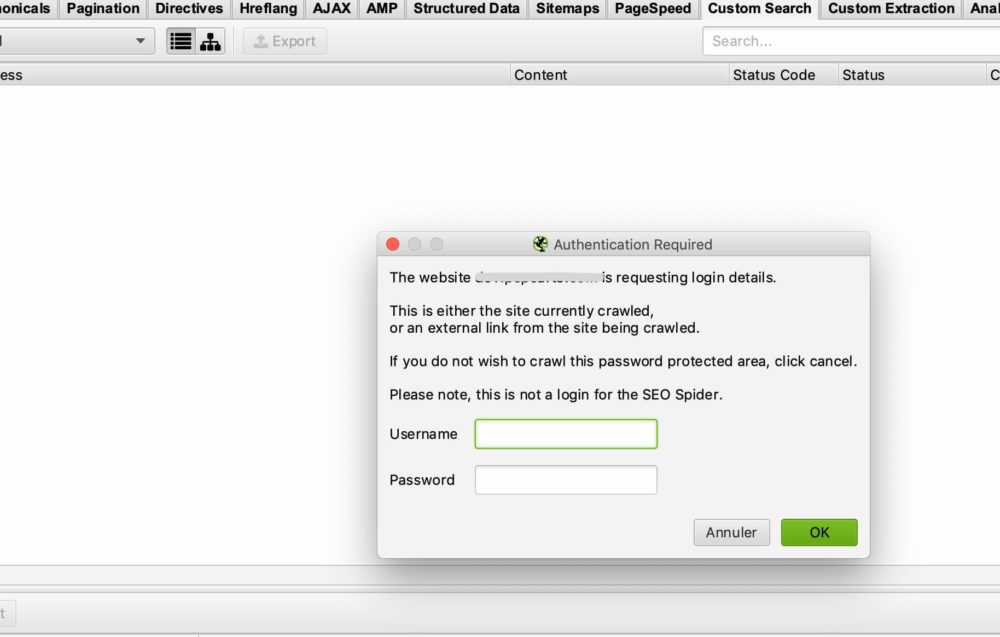
All you have to do is enter your username and password and Screaming Frog can start crawling.
In some cases, there may be a blockage via the robots.txt. In this case, you should go back to point 2/ to ignore the robots.txt file.
CASE OF AN INTERNAL FORM ON THE SITE
In the case of an internal form on the site, you can simply enter your access details in the authentication form-based part, and then allow the crawler to access the pages you wish to analyse.
10/ System :
STORAGE
This feature is also important to master in case you need to crawl sites with more than 500 000 URLs.
In this window, you have two options: Memory storage and database Storage
By default, Screaming Frog will use memory storage, which is the same as using your computer’s RAM to crawl the site. This works very well for sites that are not too big. However, you will quickly reach the limits for sites with more than 500,000 URLs. Your machine may slow down considerably and crawling may take a long time. Trust our experience.
Otherwise, we recommend switching to database storage, especially if you have an SSD drive. The other advantage of database storage is that your crawls can be stored and easily retrieved from your screaming frog interface. Even if crawling has stopped, you can resume it. This can save you long hours of crawling in some cases.
MEMORY
This is where you determine how much memory Screaming Frog can use to function. The more memory you use, the more Screaming Frog will be able to crawl a large number of URLs. Especially if it is set to memory storage.
10/ Crawl mode :
SPIDER
This mode is the basic configuration of Screaming Frog. Once you enter your URL, Screaming Frog will follow the links on your site and crawl the entire site.
LIST MODE
This mode is really useful because it allows you to tell Screaming Frog to search a specific list of URLs.
For example, if you want to check the status of a list of URLs, you can simply upload a file or copy and paste your list of URLs manually.
SERP MODE
In this mode, there is no crawling. It allows you to upload a file with, for example, your titles and meta description to see what it would look like in terms of SEO. This can be used, for example, to check the length of your titles and meta description after making adjustments in excel, for example.
Analyze your crawl data
The screaming frog interface:
Before diving into the analysis of the data presented by Screaming Frog, it is important to understand how the interface is structured.
Normally you should have something like this:
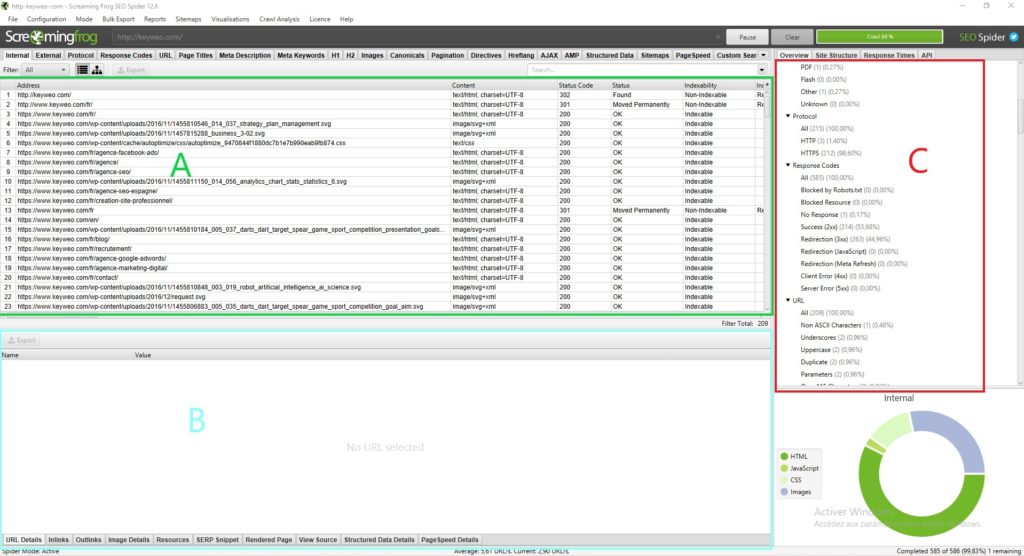
Each part has its uses and will allow you not to get lost in all the available data:
Part A (in green): This part corresponds to the list of crawled sources with, for each column, SEO indications specific to each line. In general, here you will find the list of your pages and the information specific to each page, such as the status code, the indexability of the page, and the number of words… This view changes depending on what you select in Part C.
Part B (in blue): Here you can get a more detailed view of each resource you are analyzing by clicking on it. For example, you can get an overview of the links, images, and other information on a page that can be very useful.
Part C (in red) : This part will be important to look at when you are doing your analysis because you will be able to see what can be optimized and Screaming Frog will also give you some help to facilitate your analysis. Example: Metadata script missing, multiple H1…
To find your way through the analysis of your data, we recommend you go to Part C
The overview (Part C):
1/ Summary:
In this section, you can get a global view of the site, including the number of URLs of the site (images, HTML…), the number of external and internal URLs blocked by the robots.txt, the number of URLs that the crawler could find (internal and external).
This will give you valuable information about the site at a glance.
2/ SEO Elements: Internal
In this section, you will find all the internal URLs for your site.
HTML
It is usually very interesting to look at the number of HTML URLs. For example, you could compare your number of URLs to the number of pages indexed on google with the command site: This can give you very valuable information if many pages are not indexed on google for example.
By clicking on HTML you will see that your left side will contain a lot of very important information to analyze, such as:
=> Page status code
=> Indexability
=> Title information (content, size)
=> Information on meta description (content, size)
=> Meta Keyword: not necessarily very useful to look at, unless they are still used by the site in question. For example, you could clean up these tags
=> H1 (The content, size, and presence of a second h1 and its size)
=> H2 (The content, its size, the presence of a second h2, and its size)
=> Meta Robots
=> X Robots Tag
=> Meta refresh
=> The presence of a canonical
=> The presence of a rel next or rel prev tag
=> The size of the page
=> The number of words on the page
=> The text ratio: ratio of text to code
=> Crawl Depth : The depth of the page in question on the site. The home page is at level 0 when you start crawling with this page. A page that is 1 click away from the home page will be at depth 1 and so on. Knowing that it is generally interesting to reduce this depth in your site
=> Inlinks / Unique Links: number of internal links pointing to the page in question
=> Outlinks / Unique Outlinks: number of outgoing links from this page
=> Response time: response time of the page
=> Redirect URL: page to which the page is redirected
You can also find all these elements by browsing through the different elements in the right-hand column.
If you connect the API of the Search Console, Google Analytics, Ahrefs… you will also have other columns available that would be very interesting to analyze.
JAVASCRIPT, IMAGES, CSS, PDF…
By clicking on each section you will be able to get interesting information about each type of resource on your site.
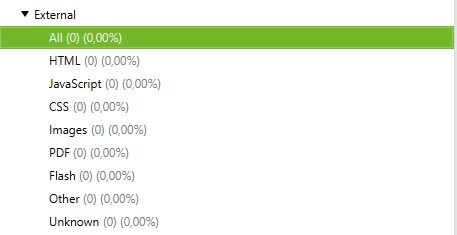
3/ SEO Elements: External
The external part corresponds to all the URLs that lead outside your site. For example, this is where you can find all the external links you create.
It can be interesting to analyze your site’s outgoing URLs and see their status. If you have 404s, it may be wise to correct or remove your link to avoid linking to broken pages.
4/ Protocol:
In this section, you can identify HTTP and HTTPS URLs.
If you have any HTTP URLs or duplicate pages in HTTP and HTTPS, it would be helpful to manage the redirection of your HTTP pages to their HTTPS version.
Another point is if you have HTTP URLs pointing to other sites you could check if the HTTPS version of these sites does not exist and replace the links.
4/ Response Code :
The Response Codes section groups your pages by code type.
=> No response: This generally corresponds to pages that the Screaming Frog couldn’t crawl
=> Success: All your pages should have status 200 here, i.e. they are accessible
=> Redirection: This section should contain all pages with status 300 (301, 302, 307…). It could be interesting to see how to reduce this number if possible to send google directly to pages in status 200
=> Client Error: Here are all pages in error with a status of, say, 404. It will be important to look at the cause and perform a redirect.
=> Server Error: All pages with a server error
5/ URL :
In this section, you will find the list of your URLs and the possible problems or improvements associated with them.
You will be able to see, for example, your URLs capitalized or your duplicate URLs.
6/ Page Titles :
Here you will get a lot of information about your titles and you can optimize them to make them much more SEO-friendly.
Here is the information you can find:
=> Missing: This will correspond to your pages that do not have a title. So you should add them if possible
=> Duplicate: This is where you will find all the duplicate titles of your site. Ideally, you would avoid them. It is up to you to see how to optimize them to avoid duplication
=> Over 60 Characters: Above a certain number of characters, your titles will be truncated in the Google results. Make sure they are around 60 characters to avoid problems
=> Below 30 Characters: Here you will find the titles that you could optimize in terms of size. By adding a few strategic words closer to 60 characters, you can optimize them
=> Over 545 Pixels / Below 200 Pixels: Like the previous elements, this indicates the length of your titles, but this time in pixels. The difference is that you can optimize your titles by using letters with more or fewer pixels to maximize space.
=> Same as H1 : This means your title is identical to your H1
=> Multiple : If you have pages with multiple titles, you can identify the problem here and see which pages need to be fixed
6/ Meta Description :
Following the same model as the titles, in this section, you have many instructions to optimize your meta description based on their size, their presence, or the fact that they are duplicated.
7/ Meta Keywords :
It is not necessarily useful to consider them unless the pages seem to have a lot of them.
It’s up to you.
8/ H1 / H2 :
In these sections, you can see if any optimizations need to be made to your Hn tags.
For example, if you have multiple h1s on the same page, it might be interesting to keep only one. Or if you have duplicated h1s on your pages, you could rework them.
9/ Images :
By analyzing this section in general, you can find optimizations for your images, such as reworking your images over 100kb or putting alt symbols on images that don’t have them.
10/ Canonical :
A canonical is used to tell google that it should go to a particular page because it is the original. For example, you have a page with parameters and this page has duplicate content from your page without parameters. You could put a canonical on the page with parameters to tell google that the page without parameters is the main one and that it should consider the original page instead.
In this part of screaming frog you will get all the information about how to manage the canonicals on your site.
11/ Pagination :
Here you will have all the information concerning the pagination on your site so that you can manage it better.
12/ Directives :
The Directives part shows the information contained in the meta robots tag and X-Robots-Tag. You can see the pages in no index, the pages in no follow, etc.
13/ Hreflang :
When auditing a multilingual site, it is very important to check whether the site has hreflang tags to help Google understand the language used on the site, even though it can be assumed that Google itself is increasingly able to understand it.
14/ AMP :
Your AMP pages will end up here and you will be able to identify the associated SEO problems.
15/ Structured data :
To have information in this section, you must activate in your spider configuration the elements specific to structured data: JSON-LD, Microdata, and RDFa.
You will have a lot of information to optimize your implementation of structured data on the site.
16/ Sitemaps :
In this part, you can see the differences between what you have on your site and in your Sitemap.
For example, it is a good way to identify your orphaned pages.
To have data in this section you also need to enable the ability to crawl your Sitemap in the crawler configuration. To simplify things, add the link to your Sitemap directly in the configuration.
16/ Pagespeed :
By using the page speed insight API you can easily identify the speed problems of your pages and remedy them by analyzing the data in this tab
17/ Custom Search et Extraction :
If you want to scrape elements or perform specific searches in the code of a page, this is the place to find the data.
18/ Analytics et Search Console :
You can find a lot of useful information in these tabs by also connecting Screaming Frog to the Analytics and Search console API.
For example, you can also find the orphan pages that are present in your tools but not in the crawl or the pages with a bounce rate higher than 70%.
19/ Link Metrics :
Connect Screaming Frog to Ahrefs and Majestic APIs and bring out information about the Netlinking of your pages (example: Trustflow, citation flow…)
Additional features of Screaming Frog
Analyze the depth of a site:
If you want to see the depth of your site it can be very interesting to go to the Site structure tab.
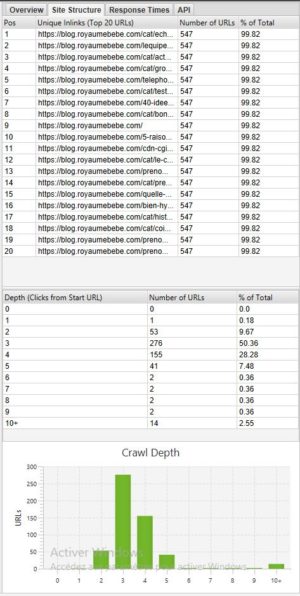
In general, it is better to have a website where most of the pages are accessible in 3 – 4 clicks. In our example above, we should optimize the depth because there are pages accessible in 10+ clicks.
Visualization of your site:
Once your crawl is finished, it could be interesting to go to Visualizations > Forced directed crawl diagram to have an overview of your site in the form of a graph.
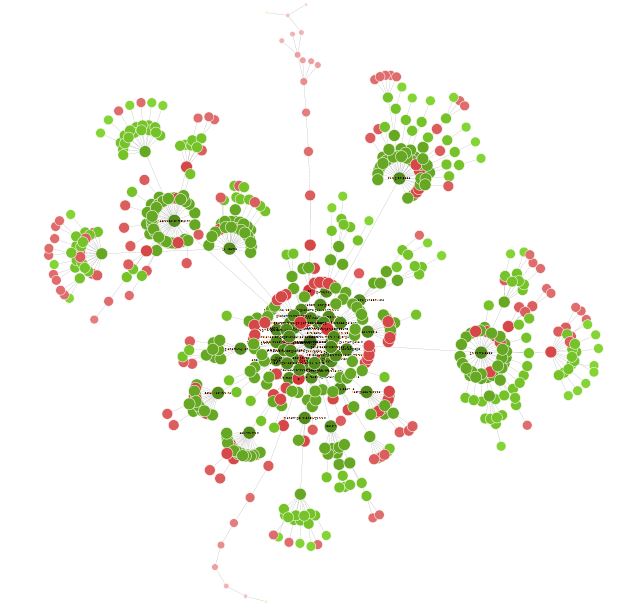
All the little red dots can be analyzed to understand whether there is a problem or not.
This visual can also lead you to rethink the structure of your site and its internal linkage.
You can spend some time with this visualization to find many interesting optimization opportunities.
Conclusion Screaming Frog
Screaming Frog will, therefore, be an indispensable tool for any good SEO. The tool will allow you to do many things from technical SEO analysis to site scraping.